Peri-Implant Surgery
[An Example of OralPedia.org entry]
Incisions and Flaps in Periodontal and Peri-Implant Surgery
Felipe Bravo, Bruna de C. F. Vajgel, Estela S. Gusmão and Renata Cimões
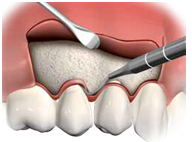
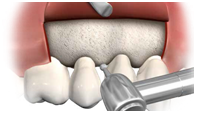
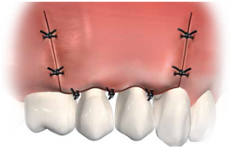
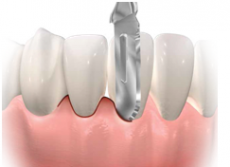
The principles of periodontal surgery, in general, do not differ from the surgical principles applied to other parts of the body. In order to perform a successful surgical procedure there are several important aspects to consider, namely: gentle tissue manipulation; firm and precise incisions; careful retraction of the flap; use of a traumatic suture techniques, and promotion of stable wound healing. Well-planned incisions are essential to gain access to the surgical site. When planning the incision, the main considerations must be the anatomy, surgical goal, and the design and a traumatic management of the flap. It is worth emphasizing the importance of a well-sharpened cutting instrument, in order to prevent unnecessary tissue damage. Clean and defined incisions will lead to better healing and less discomfort to the patient.
1 Introduction
2 External Bevel
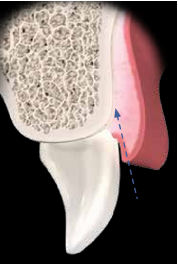
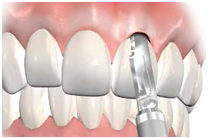
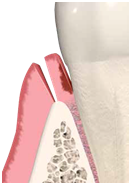
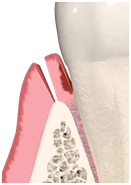
This is an incision contained in the gingiva and directed toward the crown of the tooth, with the object of eliminating pockets, improving gingival contour, and gaining access to the roots. This type of incision is frequently used in conjunction with flap surgeries when it is necessary to thin the tissue externally. It must be performed before folding the flap1. This incision is highly prevalent when performing gingivectomy surgeries [3-8].
2.1 Technique
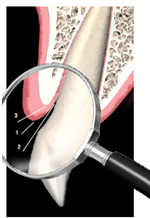
The incision is contained in the gingiva and made in the direction toward the crown of the tooth. The instrument is placed at an angle of 45 degrees in the direction toward the pocket or gingival sulcus, or in relation to the root of the tooth. It may be linear or it may outline the gingival parabola (Figure 1). In the external bevel incision, the angle is 45 degrees in relation to the root.
3 Internal Bevel
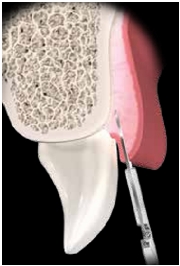
This is a basic incision for the majority of flap procedures in periodontics, which is the primary incision when performing many flap procedures [1, 6]. The aim of this internal bevel decision is to remove the epithelium from the pocket to provide direct contact between the bone and healthy connective tissue [1]. Presently, this is done with three important objectives: to remove the pocket lining, to preserve the uninvolved external surface of the gingiva, and to produce a thin, fine gingival margin for bone-to-tooth adaptation [6]. This type of incision is also denominated the inverted or reverse bevel.
3.1 Technique
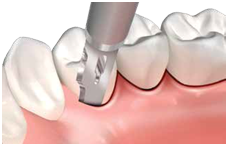
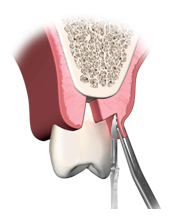
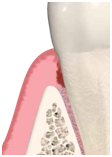
One begins at a certain distance from the gingival margin and ends at the bone crest; the inclination of the incision is inverse to the incision for gingivectomy, as it is made at an angle of 45 degrees in relation to the crown. The blade is placed parallel to the long axis of the tooth in the apical direction toward the alveolar crest, and is placed on the crest of the margin, or 0.5 to 2.0 mm away from it. The contour is dictated by the anatomy of the tooth and shape of the root (Figure 2).
Figure 2. Internal bevel incision showing the distance away from the gingival margin. The incision is angulated in the direction of the alveolar crest (A, B); front view of the internal bevel incision (C).
4 Sulcular Incision
This incision is performed when one wishes to preserve all the existent keratinized tissue [1]. It may also be denominated the secondary incision [6].
4.1 Technique
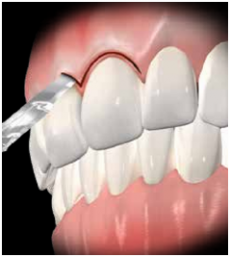
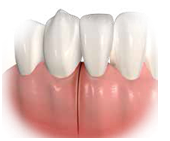
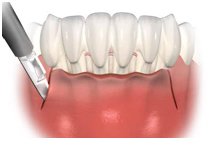
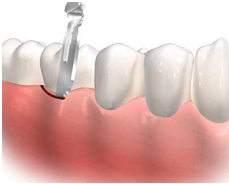
The scalpel blade is inserted into the gingival sulcus, parallel to the long axis of the tooth, in the direction toward the alveolar crest. This technique requires the inclusion of the largest possible amount of papillaein the flap (Figure 3).
Figure 3. Side view of an intrasulcular incision, showing that the incision is directed into the gingival sulcus (A, B); front view of the intrasulcular incision (C); intrasulcular incision in the palatal region (D).
5 Relaxing Incision
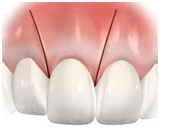
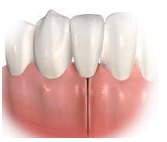
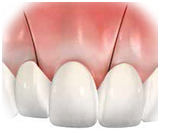
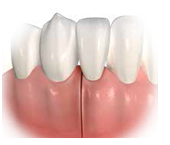
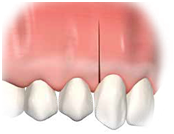
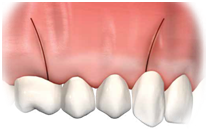
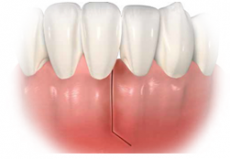
This type of incision may also be denominated the vertical or oblique relaxing incision. Relaxing incisions must extend beyond the mucogingival line in order to allow the flap to be displaced, and they should be avoided in the lingual and palatal areas [6]. They are made perpendicular to the gingival margin, increasing access to the alveolar bone, in addition to diminishing the tension of flaps. They also allow apical and coronal positioning of flaps, and limit the inclusion of a healthy site in the surgical field. Furthermore, relaxing incisions must not be made in pronounced concavities, must not divide the interdental papillae, and must not be located in the middle portion of the teeth (Figure 4).
Figure 4. Relaxing incisions. Incorrect location of the relaxing incision (A-C); correct location of the relaxing incision (D-F).
5.1 Technique
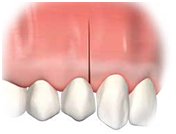
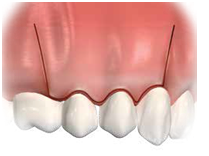
Incisions are made with the scalpel in the perpendicular position, and may or may not include the papillae in the flap. The incision must not cross the prominence of the adjacent tooth root (Figure 5).
Figure 5. Unilateral relaxing incisions (A, B); bilateral relaxing incision (C); positioning the scalpel blade to perform relaxing incisions (D).
6 Incision for Reducing Thickness
These incisions reduce the volume of connective tissue in the flap and are used to reduce the thickness of tissues. They are frequently used in interproximal wedge surgeries and for the reduction of voluminous papillae [1] (Figure 6)
Figure 6. Incision for removing connective tissue.
7 Contra-incision
These are small incisions made on the apical surface of vertical relaxing incisions. Contra-incisions are used in conjunction with pediculated flaps to promote greater mobility. They must not exceed 2 to 3 mm in length, so that the blood supply is not compromised [1]. This type of incision was described by Corn in 1964 (Figure 7).
Figure 7. Contraincision to favor greater flap mobility.
8 Relaxing Incision in the Periosteum
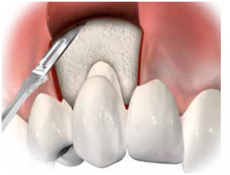
Relaxing incisions in the periosteum are used to advance the flap, either in the coronal or lateral direction, thereby allowing positioning of the flap without tension. The scalpel blade faces the flap, cutting the subjacent periosteum1 (Figure 8).
Figure 8. Mucoperiosteal flap (A); incision in the periosteum to increase flap mobility (B).
9 Flaps Used for better Visualization and Cleaning of Periodontal Pockets
9.1 Widman Flap
Widman [10] was one of the first researchers to describe a surgical technique for eliminating periodontal pockets. The author described a mucoperiosteal flap designed to remove the epithelium and the inflamed connective tissue from the pocket, in addition to facilitating correct cleaning of the root surface.
9.2 Technique
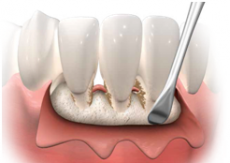
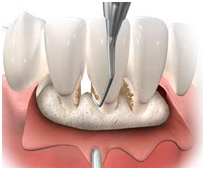
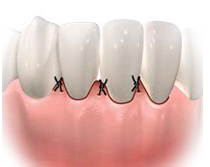
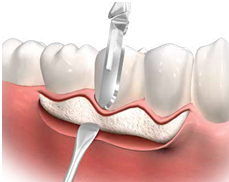
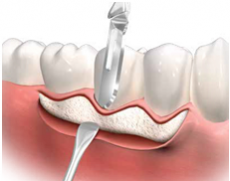
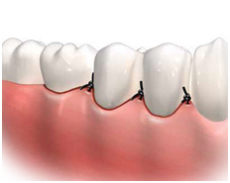
Two relaxing incisions are performed to delimit the surgical area. One incision is made accompanying the gingival margin contour, separating the epithelium from the pockets in the non-inflamed gingiva. The flap is displaced, exposing around 2 to 3 mm of alveolar bone (Figure 9). After this, the inflamed tissue is removed with curettes, and the alveolar bone is scaled and re-anatomized (Figure 10). The flap is repositioned and kept in place with interproximal sutures (Figure 11).
Figure 9. Relaxing incision in the Widman flap (A); lifting the flap, and then removing the collar of inflamed tissue (B).
Figure 10. Bone recontouring after removing inflamed tissue.
Figure 11. Flap sutured with the gingival margin located at bone crest level.
10 Neumann Flap
A few years after Widman [10], Neumann [11] described a technique for treatment with flaps, but this differs little from techniques previously proposed, although the main objective was still to facilitate correct cleaning of the root surface.
10.1 Technique
An intrasulcular incision is made, outlining the affected teeth in the direction of the apical portions of the pockets, and separating the mucoperiosteal flap. Both are delimited by relaxing incisions.
After this, the internal surface is curetted to remove the epithelium from the pocket and the granulation tissue. The root surface is scaled and planed, and bone irregularities are removed. The flap is repositioned following adjustments to ensure ideal flap adaptation.
11 Kirkland Flap (Modified Flap)
This procedure was idealized in 1931 by Kirkland [12], who was concerned about the esthetic harm done by scar retraction, and was proposed to be a more conservative technique that was very similar to the surgery proposed by Neumann. He called the technique modified flap surgery, and developed a series of instruments for use in this technique. The purpose of the flap was to gain access and to enable adequate root debridement, without relaxing incisions and without the need for removing gingival tissue, thus causing few changes in the anterior region, as there were no relaxing incisions and no gingival tissue removal.
11.1 Technique
Intrasulcular incisions are made up to the bottom of the pocket, both on the vestibular and lingual surfaces. The incisions were extended in the mesial and distal directions (Figure 12).
The flap is detached to expose the root surfaces for debridement. If there are angular bone defects, they must be curetted (Figure 13).
Granulation tissues and the epithelium of the pocket are eliminated from the internal surface of the flap. The flap is repositioned with interproximal sutures (Figure 14).
Figure 12-Intrasulcular incision for the Kirkland flap.
Figure 13. Displacement of the gingiva for visualization of the root surface.
Figure 14. Mechanical debridement of the root surfaces (A); the flap is repositioned in the original position and sutured (B).
12 Modified Widman Flap
In 1974, Ramfjord and Nissle [13] described the modified Widman flap. This techniqueis recognized as the “open flap curettage technique”, and was inspired bythe techniques proposed by Widman (1920) [10], Neumann (1920) [11] and Kirkland (1931) [12]. It consists of open field curettage with the purpose of gaining attachment. The characteristics of the technique are that it facilitates correct root surface cleaning, however, without performing apical and bone contour displacement, in order to preserve the gingival height of the flap. [13]
12.1 Technique
For this technique it is necessary to perform incisions in three directions (Figure15).
The first incision is made at a distance of more or less 1 mm from the gingivalmargin and parallel to the long axis of the tooth (Figure 16).
The full thickness of the flap is carefully displaced. The second incision, which is intrasulcular, is made around the teeth up to the alveolar crest (Figure 17).
The third incision is made in the horizontal direction or perpendicular to the root, to separate the collar of gingival tissue from the alveolar bone (Figure 18). After this, root scraping and planing are performed. The flap is adjusted to protect all the bone tissue, and is sutured with in terproximal stitches (Figure 19).
Figure 15. Incisions for performing the modified Widman flap.
Figure 16. Initial incision of the flap made at a distance of 0.5 to 1.0 mm from the gingival margin (A); parallel to the long axis of the tooth (B).
Figure 17. Second intra-sulcular incision (A); separation of the soft tissue from the root surface (B).
Figure 18. Third incision made perpendicular to the root surface, and close to the bone crest (A); separation of the gingival collar from the alveolar bone (B).
Figure 19. Flap adjusted to completely cover the alveolar bone (A); side view showing the alveolar bone completely covered with soft tissue (B).


